
Kobe Coleman
March 8, 2022
Tutorial
TensorFlow Tutorial
Table of Contents
Background
TensorFlow is an open source library that creates and configures machine learning models in an incredibly accessible fashion. Those models are then able to be used in a wide variety of scenarios, including Android applications, Python, Javascript, etc. With Tensorflow, you can create models directly from your device.
Compatability
You’re going to need to install multiple components, so before you try to set it up, consult either the Mac/Linux or the Windows compatiblity chart to make sure that you’re installing the CUDA software that works properly with the Tensorflow package you’re trying to use. Tensorflow works with Python versions 3.8 - 3.10. It’s just that the version of Tensorflow depends on what version of Python is being used. According to this documentation, Python 3.8 supports Tensorflow 2.2+, Python 3.9 supports Tensorflow 2.5+, and Python 3.10 supports Tensorflow 2.8+.
Installation
Python
You won’t need to install Python manually for the purpose of using Tensorflow because you’re going to create a Python environment. However, you might want to have it for other uses. When Python is being installed, make sure that the installation comes from the Python website itself so that all of the features are available. Also during the installation, make sure to check the option of adding it to the system path so that Python is easily recognized in your machine when you try to execute Python programs.
Microsoft Visual Studio
IDE
To install the IDE, just use this link. If it doesn’t work with Visual Studio 2022, the usage of Tensorflow was tested to work with Visual Studio 2019.
Build Tools
After you installed the IDE, you need to verify that certain workloads and components are installed. To do that, you need to access the Visual Studio Installer to manage the installations themselves.
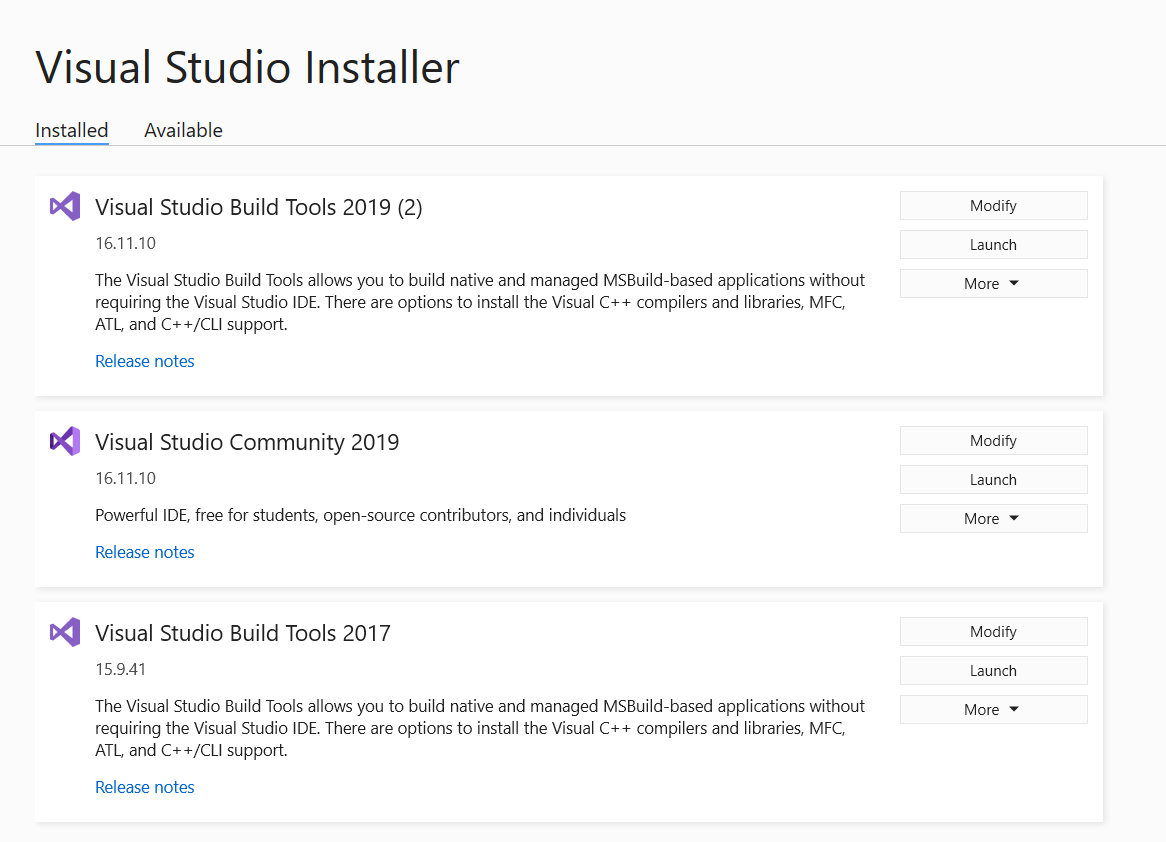
After installing Visual Studio Build Tools, you need to select Modify and then you should see the following:
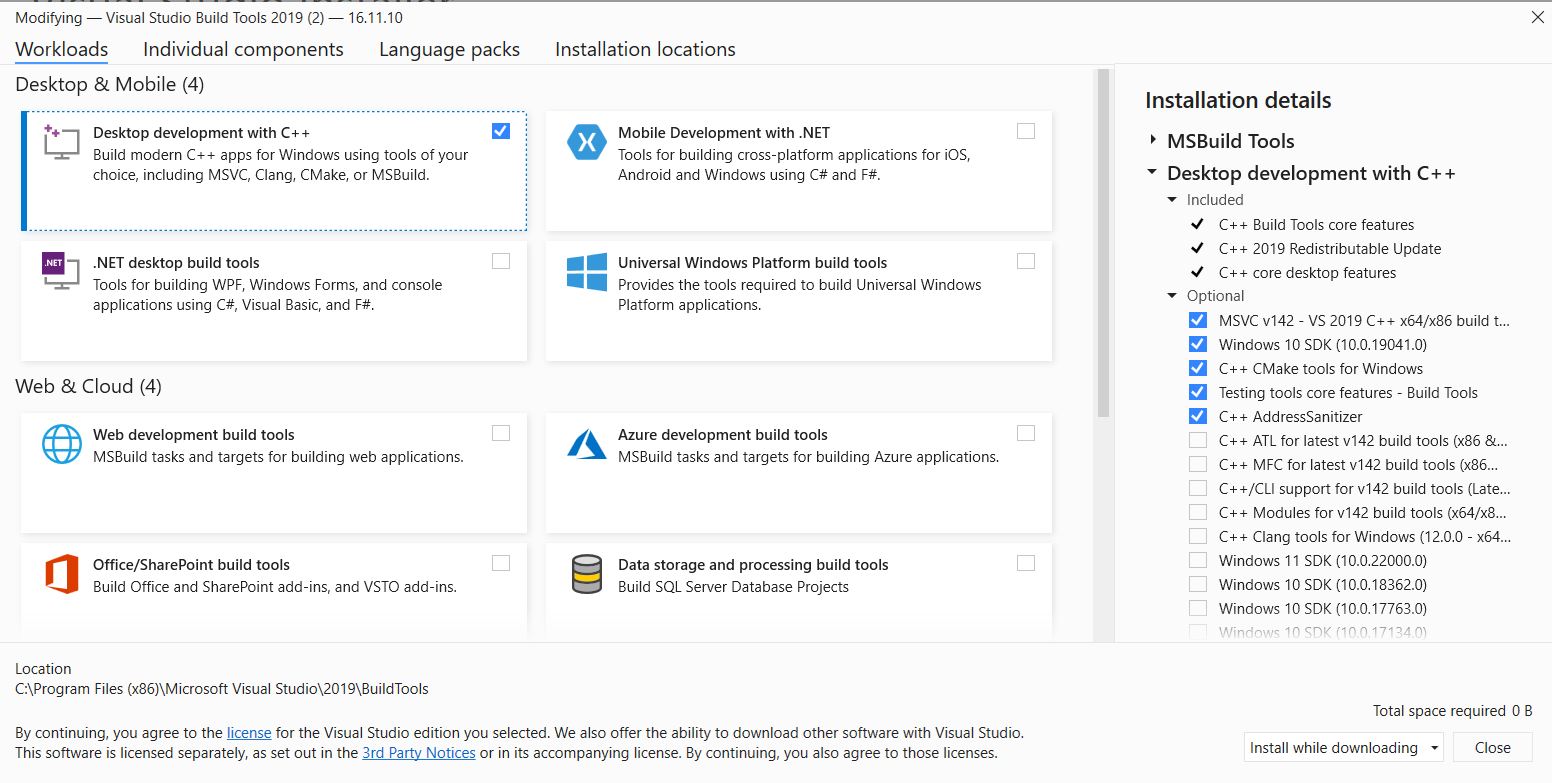
You’ll need to make sure that Desktop development with C++ is checked along with the the Windows SDK and the MSVC component you see on the right hand side under that workload.
NVIDIA
If you don’t have a NVIDIA PC, just try your best to mirror the steps below.
GeForce Experience
If you have a NVIDIA PC, you should already have this application, but if you don’t, just install it through here. Once you have it, open it and make sure that your GPU drivers are updated. If you don’t have a NVIDIA PC, just try to make sure your GPU drivers are updated.
CUDA Toolkit
Now once you figure out which CUDA is compatible with the Tensorflow version you’re planning to use, you’ll need to create an account in NVIDIA Developer in order to access the CUDA Archive where you can find your version of CUDA to install. Link to NVIDIA Developer is here is here and the link to the CUDA Archive is here.
cuDNN
Use this link in order to install the cuDNN. You’ll fill out a survey and then proceed to install it. Make sure it’s the correct cuDNN version. After it’s installed, unzip the file and then do the following:
a) Copy <installpath>\cuda\bin\cudnn64_7.dll to C:\Program Files\NVIDIA GPU Computing Toolkit\CUDA\<yourversion>\bin.
b) Copy <installpath>\cuda\ include\cudnn.h to C:\Program Files\NVIDIA GPU Computing Toolkit\CUDA\<yourversion>\include.
c) Copy <installpath>\cuda\lib\x64\cudnn.lib to C:\Program Files\NVIDIA GPU Computing Toolkit\CUDA\v10.1\lib\x64.
Anaconda
Next, it’s recommended to install the Anaconda Python interpreter. If you try to execute a Python program with Tensorflow the normal way, it doesn’t work. Follow this link and it’s pretty straightforward.
Setup
Verification
Now that everything is installed, you can move on to the setup stage. First you want to verify the CUDA installation, so go to your File Explorer, and try to go to C:\ProgramData\NVIDIA Corporation\CUDA Samples. You may have to show hidden items under the “View” tab to see the ProgramData directory. Once you go there, go to [CUDAversion]/1_Utilities/deviceQuery. There should be a solution that you just select that opens up your Visual Studio IDE. Make sure it’s the right Visual Studio. Once you do that, run the solution, and make sure that you get a Result = PASS on the output, shown here. 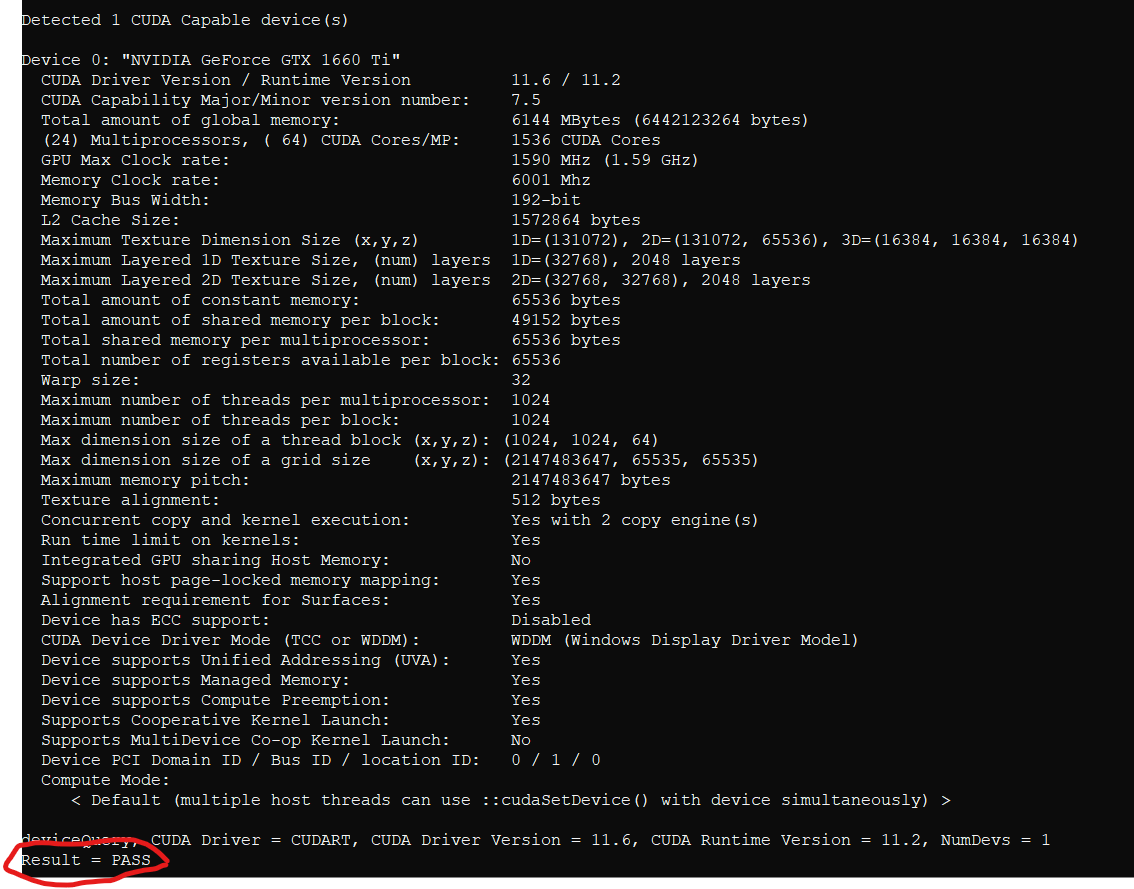
Path Recognition
Once the verification is done, you need to add CUDA to the path. To do that, just search for Edit the system environment variables in the Start menu, select Environmnet Variables, and then under System Variables, select the Path variable and add the following paths individually to this Path variable:
C:\Program Files\NVIDIA GPU Computing Toolkit\CUDA\[your version]\bin
C:\Program Files\NVIDIA GPU Computing Toolkit\CUDA\[your version]\lib\x64
C:\Program Files\NVIDIA GPU Computing Toolkit\CUDA\[your version]\include
Select OK three times, and you’re done with the path recognition.
Anaconda Configuration
Now for the good stuff. First, open up the Anaconda command prompt and enter these commands to install the required packages:
conda update conda
conda update anaconda
Once you install the packages, the Python environment needs to be created. The Python version could be 3.7 or later.
conda create -n TensorFlow-GPU python=3.7
Then activate the environment. Once you’re inside the environment, install Tensorflow:
conda activate TensorFlow-GPU
pip install tensorflow
Then test the installation by opening the python interpreter in the environment:
python
In the interpreter, enter import tensorflow as tf and make sure no errors happen when you enter. If it allows you to move on with another statement, you’re now able to use Tensorflow with Python!
Execution
Here’s an example that uses Tensorflow to create a model that classifies objects in a frame that a device collects. If you want to test it out, just create a new Python file and paste this code in that file:
from tflite_model_maker import image_classifier
from tflite_model_maker.image_classifier import DataLoader

data = DataLoader.from_folder('cars/')

model = image_classifier.create(data, epochs=50)

loss, accuracy = model.evaluate(data=data)

model.export(export_dir='./car_labeler/app/src/main/assets/custom_models')
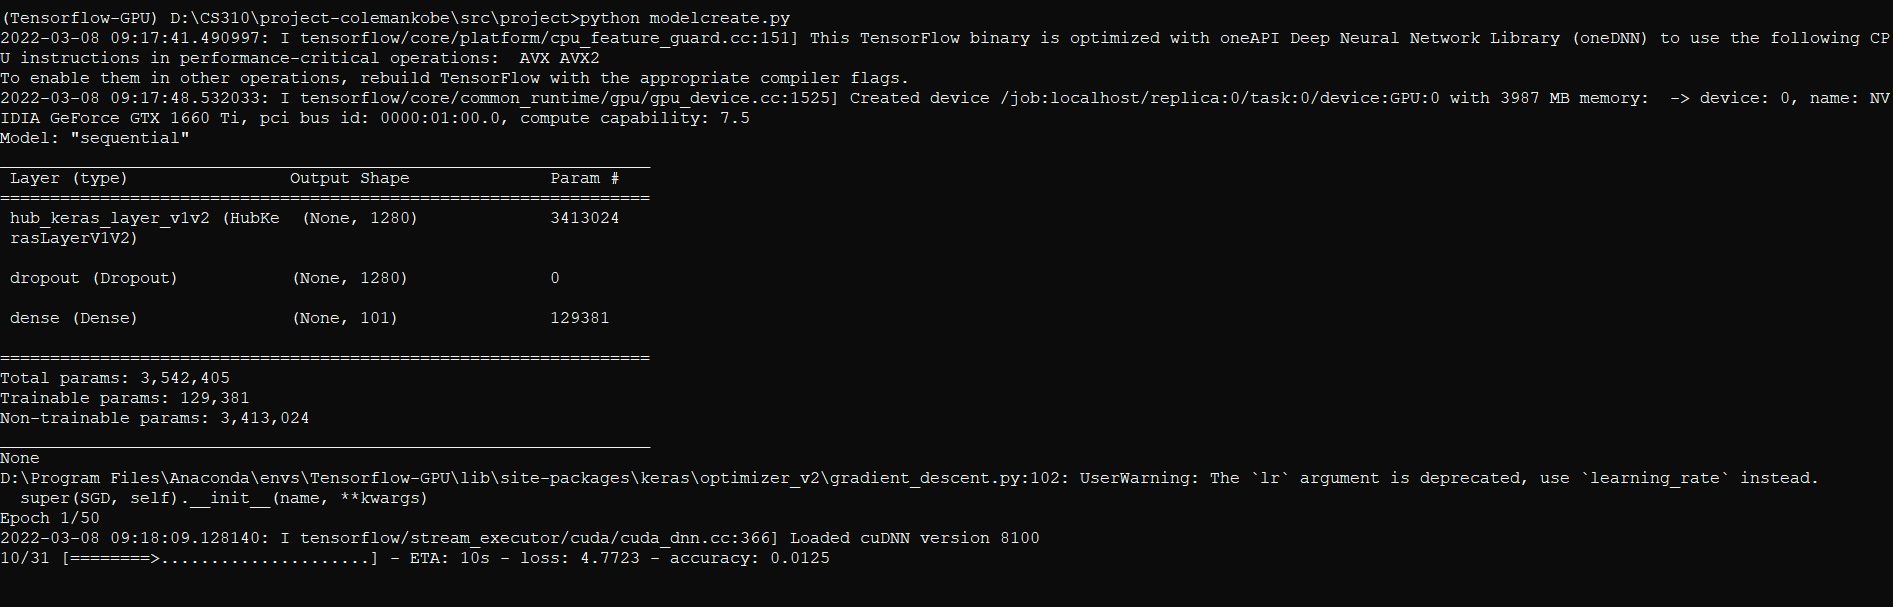
Once you add your images to a cars directory, go to your Anaconda prompt and activate the Tensorflow environment, you should then be able to have a successful execution like this:
And that’s just one of the many uses of Tensorflow that are available!